GOAL: Build a lightweight, bootable *.img file that you can flash onto a Raspberry Pi SD card. This will be the shortest, fastest Buildroot tutorial you read, and the tutorial is optimized for speed and simplicity. For a deep dive, see the Buildroot manual.
INTENDED AUDIENCE: Raspberry Pi hobbyists. Software developers with minimal embedded systems experience. I will assume that you know how to program but don't do embedded systems or hardware stuff
professionally.
READ TIME: About 10 minutes, excluding exercises.
RECOMMENDED READING: I've written two related blog posts that will help you understand this article's content better. They are entirely optional:
Build a Raspberry Pi Linux System the Hard Way
teaches you how to compile a Linux distro from source using only rocks and tree branches.Practices that Make Raspberry Pi Work Easier
covers some lesser-known tips and tricks that will increase your efficiency when doing Raspberry Pi work. The biggest takeaway is to just buy that darn $5 USB TTL cable.
REQUIRED HARDWARE:
- An x86 Linux desktop computer. This article was written on the latest version of Xubuntu.
- An RPi3. Other models will work also, but you will need to make slight changes to the steps.
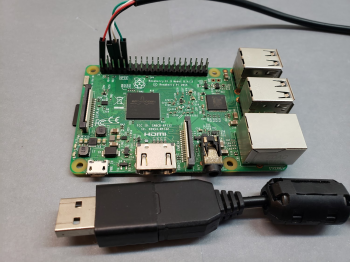
- A TTL USB cable - Found online and costs about as much as a pack of gum.
- A blank SD card - Just a few GBs is enough.
- An SD Card reader/writer.
REQUIRED SOFTWARE:
- A Linux distribution of some sort
- A TTY terminal application, such as Tio
Why Use Buildroot on the Raspberry Pi?
When you need a Linux image for your Raspberry Pi, most Raspberry Pi hobbyists download Raspberry Pi OS for their projects. You can use it by downloading Raspberry Pi Imager or flashing a *.img file to the Pi's SD card. For most hobby projects, this is adequate.
There are times when this won't work, though:
- You want to reproducibly build a *.img file every time you make a new version so that your end users can download and flash a single file onto their SD card.
- You want to squeeze every drop of SD card space and performance out of the Linux distro by removing all unused components.
- You need to build Linux systems regularly and do not want to reinvent the wheel by writing your own tooling.
- You are building a serious project on a team and need a build system that others can understand.
- You are building a serious project and want control over when and how OS system components change.
Buildroot solves these problems.
What Is Buildroot?
Buildroot is a collection of tools that allow you to configure a custom Linux system by navigating a series of configuration menus. Buildroot can then use these configuration options to reproducibly build a full Linux system, often in one step (you run make). Buildroot is not a Linux distro. Instead, Buildroot is a tool that creates bootable Linux images.
If you read my article about building a Linux system from scratch, it becomes apparent that making a Linux system is a detailed process. Configuration is complicated, and numerous tools must be installed on the host and target machine. The patchwork of configuration files, cross-compilers, and device-specific hardware settings is overwhelming.
The process could certainly be managed manually. Unless your goal is to learn, you probably don’t want to do this. You would instead want a tool that automates compilation and streamlines config generation. This is the problem that Buildroot solves.
Buildroot is not the only tool available. The main alternatives to Buildroot include Yocto and Elbe. There are also RPi-specific alternatives available such as Pi-Gen.
Get Buildroot
To begin a Buildroot project, you must download the latest version of Buildroot to your host machine.
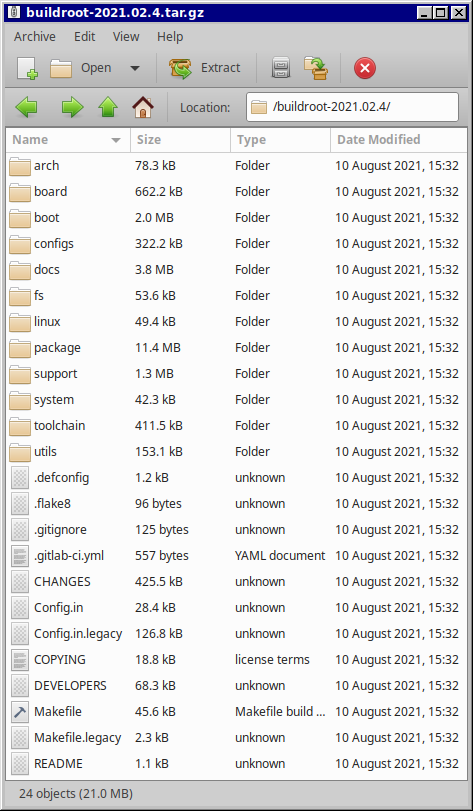
Visit the Buildroot downloads page and download the latest tarball. Alternatively, you can clone a Git repo.

Once you have the file:
- extract the archive to a directory.
cdinto the directory
All shell commands moving forward will assume you are in the root level of Buildroot unless otherwise noted.

What Is a Defconfig?
Now that Buildroot is on your hard drive, let’s take a moment to discuss the concept of defconfigs.
As mentioned in the intro, one of Buildroot’s primary responsibilities is configuration management.
The menu configuration options are stored in text files that look something like this:
CONFIG_CPUSETS=y
CONFIG_CGROUP_DEVICE=y
CONFIG_CGROUP_CPUACCT=y
CONFIG_NAMESPACES=y
# CONFIG_UTS_NS is not set
# CONFIG_IPC_NS is not set
# CONFIG_PID_NS is not set
# CONFIG_NET_NS is not set
CONFIG_SCHED_AUTOGROUP=y
A Linux system has many moving parts. Wether you are building a Linux image from scratch or using a tool like Buildroot, you need to keep track of individual configuration options. These options vary in purpose and specify important things like what type of hardware is available on the platform, which kernel modules should be included in the output image, etc.. Each driver and software package you include in the final OS image has its own config entry. That’s a lot of stuff to check!
There are thousands of these options in an average project. Luckily, the configuration options are rarely modified manually. The Linux kernel and many Linux-facing projects like Buildroot use a menu-based configuration system to search through the options available.
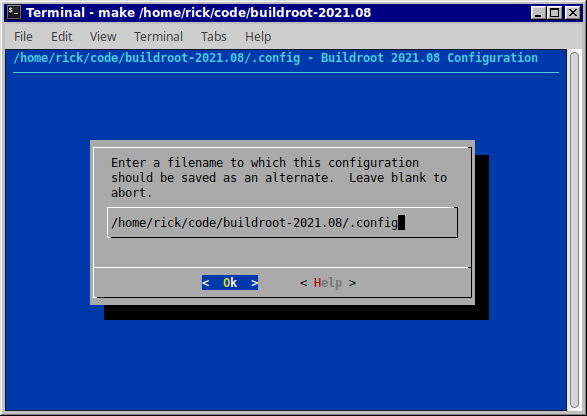
In Buildroot, you can access the configuration options by running make menuconfig from the project root directory, though you should not run this command yet- we will cover this in the “Run Configuration” step.

This brings us back to the main question: what is a defconfig? A defconfig is a “default configuration” for the countless options available for a particular target. These defaults are based on the platform (Raspberry Pi 3). The defconfig offers a good starting point for building a system since you probably don’t understand the board well enough to guess every single option. Without a defconfig, we would need to manually set every architecture-specific setting.
Buildroot ships with several defconfigs for a variety of boards, including the Raspberry Pi.
Once we have defaults set with a defconfig, we can enter make menuconfig to navigate and fine tune these configuration options.
Listing Defconfigs
We now know that a defconfig is a default configuration and we want to use one to apply default Raspberry Pi 3 settings. Let's take a look at all the available defconfigs by runnning make list-defconfigs.
At the time of writing, Buildroot ships with 262 possible defconfigs.
A shortened example output is shown below:
Built-in configs:
  aarch64_efi_defconfig               - Build for aarch64_efi
  acmesystems_acqua_a5_256mb_defconfig - Build for acmesystems_acqua_a5_256mb
  acmesystems_acqua_a5_512mb_defconfig - Build for acmesystems_acqua_a5_512mb
  acmesystems_aria_g25_128mb_defconfig - Build for acmesystems_aria_g25_128mb
  ... List shortened for clarity ...
Since we are working with a Raspberry Pi, let's pipe make list-defconfigs through grep to get a better idea of which boards are available:
$ make list-defconfigs | grep "raspberrypi"
  raspberrypi0_defconfig              - Build for raspberrypi0
  raspberrypi0w_defconfig             - Build for raspberrypi0w
  raspberrypi2_defconfig              - Build for raspberrypi2
  raspberrypi3_64_defconfig           - Build for raspberrypi3_64
  raspberrypi3_defconfig              - Build for raspberrypi3
  raspberrypi3_qt5we_defconfig        - Build for raspberrypi3_qt5we
  raspberrypi4_64_defconfig           - Build for raspberrypi4_64
  raspberrypi4_defconfig              - Build for raspberrypi4
  raspberrypicm4io_64_defconfig       - Build for raspberrypicm4io_64
  raspberrypicm4io_defconfig          - Build for raspberrypicm4io
  raspberrypi_defconfig               - Build for raspberrypi
As we can see, there are 10 possible defconfigs for the Raspberry Pi.
Run Configuration
I will use the raspberrypi3_defconfig for this tutorial. Apply the defconfig by running
make raspberrypi3_defconfig
You will see the following output:
#
# configuration written to /foo/bar/buildroot-2021.08/.config
#
If you want to see the configuration that was generated, run:
cat .config
At the time of writing, this defconfig produces around 350 configuration options.
Install Packages and Customize Configurations
We now have a clean slate of config options for an RPi3 target. This is the part where you can really see how Buildroot makes life easy.
Let's imagine that we are working on a project that requires Lua, a scripting language interpreter. If we were not using a tool like Buildroot, we would need to locate the Lua source packages, compile its dependencies and finally build Lua from source. After that, we would place the compiled file(s) into the target filesystem.
In Buildroot, the process is much simpler:
- Run
make menuconfig - Locate the
luabuildroot package. - Enable the package before building the system.
Let's try that out. First, open menuconfig:
make menuconfig
You should see a menu similar to the screenshot in the What Is a Defconfig?
section.
Now that menuconfig is open let's search for the Lua Buildroot package. You can search for packages by typing the /
character:

Type lua
and press enter:

Buildroot packages are placed into a series of nested categories. We navigate through these categories to find the packages we want to enable or disable.
In the case of the Lua package, it tells us that the package is nested in the following location:
  Location:
    -> Target packages
(1)   -> Interpreter languages and scripting
Press enter to return to the main menu. Navigate to the section Interpreter languages and scripting
within the category Target packages
:

After selecting the Lua package (hit the space bar), select SAVE
to commit your changes to .config:

You can now exit menuconfig. We are ready to build the system.
Build the System
To build the system, run:
make
This will take a very long time, even on a fast system. Buildroot is now compiling all system resources and dependencies.
On my relatively fast machine (10th gen Core i7), the process took 58 minutes.
Once the process completes, you will have several files available in the output/ directory.
Burn the SD Card Image
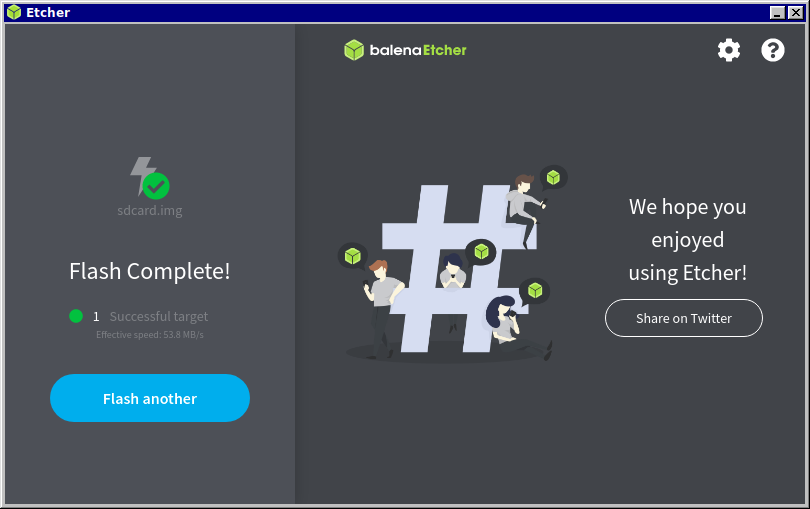
After make completes, the most crucial output file is output/images/sdcard.img. As the name suggests, it is an SD card image that you can flash to your Raspberry Pi. It is the bootable OS image. In our case, the file is around 159 megabytes in size.
Burn this image to an SD card, using either Balena Etcher or the dd command line tool.


Verify Installation

We are ready to verify installation.
- Insert the SD card into the Raspberry Pi
- Plug the TTL-to-USB cable into the Raspberry Pi
- Plug the USB cable into your laptop.
- Run
tio /dev/ttyUSB0(might requiresudoon your system depending on your user settings) - Enter
rootas your username - Verify that
luainstallation succeeded by runningluaat the command line.

Congratulations, you've successfully built a Linux system with Buildroot. :clap:
Extra Things I Did Not Cover
Many Buildroot tutorials will attempt to teach all of the essentials in one go. Unfortunately, this leads to confusion in the early phases of learning. My tutorial intentionally skips many advanced aspects of Buildroot to avoid information overload.
Now that you have an understanding of the basics, I challenge you to investigate more advanced topics such as:
- How to customize partitions
- How to setup WiFi networking
- How to use Rootfs overlays
- How to build custom Buildroot packages for things that are not included with Buildroot by default
- How to configure init and add startup tasks
- How to set a root password and add non-root users
I wish you luck on your embedded Linux learning journey!
One Last Thing
Please consider sharing my writing on sites like Lobsters, Hacker News and Reddit if you've made it this far. I also enjoy hearing suggestions from readers about what I should write about next- please leave a comment.